Setting Up FormIt for Development
In order to test and build plugins in the FormIt desktop app, you'll need FormIt for Windows v17.0 or later.
Display Script Editor and Script Output
In the top menu of FormIt, go to Window in the top menu and check the Script Editor and Script Output boxes.
The Script Editor and Script Output panels will appear at the bottom of the FormIt window.
Switch between the Script Editor and Script Output by using the buttons at the bottom.
You can also arrange both panels side by side. Click the button next to the "x" in the upper right corner to detach one of the panels, then drag and drop the panels next to each other:

Script Editor
The Script Editor provides a simple development environment where you can write and test code.
The Script Editor stores written code inside a scratch.js file in the directory where the FormIt.exe file is located.
At the top are two buttons:
Run ![]() : Executes all code written in the window.
: Executes all code written in the window.
Run Selection ![]() : Executes only the selected/highlighted lines of code.
: Executes only the selected/highlighted lines of code.
Script Output
The Script Output window displays any messages printed to the console from plugins.
You can clear the output by running console.clear(); in the Script Editor.
Working with Sample Plugins
After cloning a repository and setting up a web server, you can now get your local plugins to show up in FormIt.
You can load or install any of the plugins, but for the purposes of this exercise, you'll install both a panel-based and a toolbar-based plugin. We'll assume your npm http-server is running on port 8080 hosting both example repositories.
Load vs. Install
FormIt.LoadPlugin(); loads the plugin only for the current session. The plugin will be unloaded automatically when the app is closed and restarted.
This is a great option for temporarily manifesting a plugin for testing in the current session only.
FormIt.InstallPlugin(); makes the plugin persist using a registry key. This is great for plugins you'll use frequently from session to session.
On Windows, the following registry keys are used to persist plugins:
Plugins: Computer\HKEY_CURRENT_USER\Software\Autodesk\FormIt 360\Plugins\InstalledPlugins
Use FormIt.UninstallPlugin(); to uninstall.
In the following examples, unless otherwise noted, feel free to use either Install or Load, depending on whether you want the results of the exercise to be persistent or not.
Toolbar Plugin Sample: Flip Along
In the Script Editor, run the following:
If running a local server:
FormIt.LoadPlugin("http://localhost:8080/FlipAlong");
If loading from the FormIt GitHub repo (requires an internet connection):
FormIt.LoadPlugin("https://formit3d.github.io/FlipAlong");
You should see the Flip Along toolbar appear at the top of the application window:
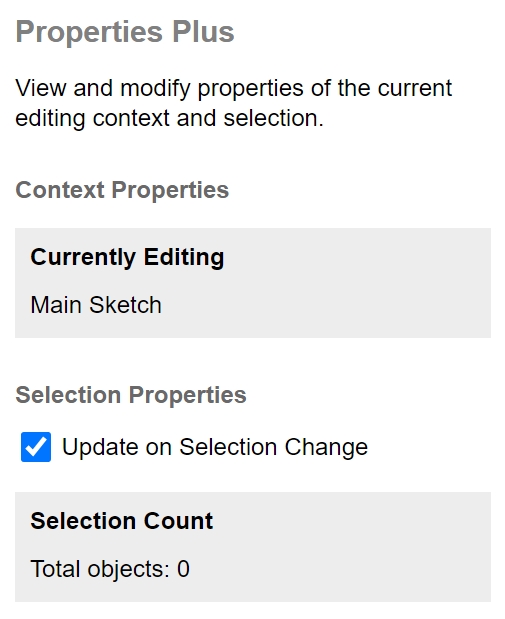
HTML Panel Plugin Sample: Properties Plus
In the Script Editor, run the following:
If running a local server:
FormIt.LoadPlugin("http://localhost:8080/PropertiesPlus");
If loading from the FormIt GitHub repo (requires an internet connection):
FormIt.LoadPlugin("https://formit3d.github.io/PropertiesPlus");
You should see the Properties Plus panel appear on the right side of the application window:

Modal and Modeless Dialog Plugin Sample
Dialog plugins are unique: They can only be loaded, not installed.
In the Script Editor, run the following:
If running a local server:
Modal:
FormIt.LoadPlugin("http://localhost:8080/FormItExamplePlugins/ModalDialog");Modeless:
FormIt.LoadPlugin("http://localhost:8080/FormItExamplePlugins/ModelessDialog");
If loading from the FormIt GitHub repo (requires an internet connection):
Modal:
FormIt.LoadPlugin("https://formit3d.github.io/FormItExamplePlugins/ModalDialog");Modal:
FormIt.LoadPlugin("https://formit3d.github.io/FormItExamplePlugins/ModelessDialog");
You should see the Hello Block! panel from the HTML panel example appear on screen as either a modal or modeless dialog.
Last updated